Utilizing an iPad, app, and kiosk you can quickly and easily set up a virtual receptionist anywhere around your office. There are a number of benefits to having a virtual iPad receptionist kiosk in your office.
Implementing a kiosk can:
- reduce overhead
- save office space
- kiosk has multiple purpose use
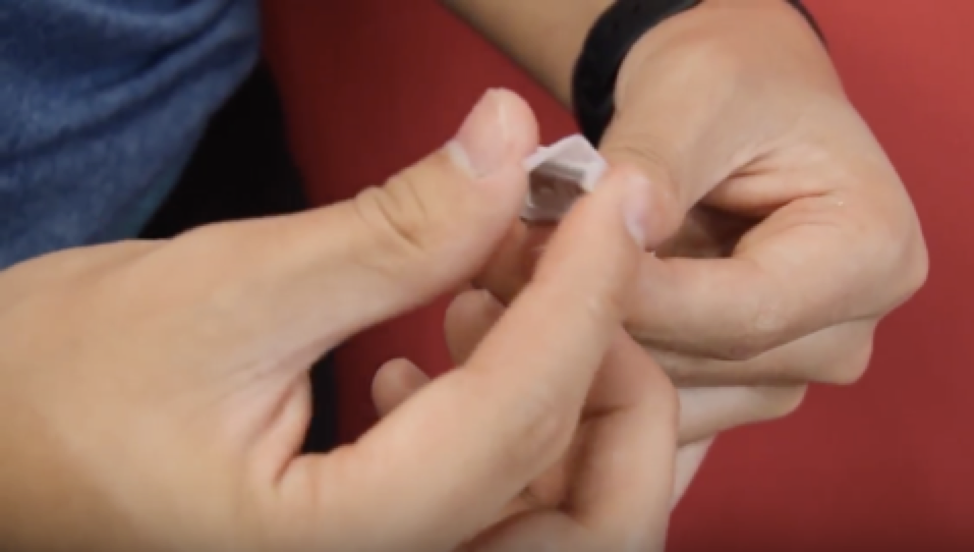
Feed power cable through kiosk arm
Pre-install the power cable
This step can be done later, but it is recommended to complete this step before assembling any part of the kiosk. For easier grip, I attached a piece of tape to the USB end of the power cable. Then I run the cable through the angled end of the kiosk arm until it reached the other end. Using a pair of tweezers I gripped the tape and carefully pulled the USB end of the power cable through the bottom end of the kiosk arm.
Since the standard iPad cable isn’t long enough a separate cable will need to be purchased. I recommend purchasing an Apple MFi certified cable. Why get an Apple MFi certified cable? Good questions, especially since the price difference, is significant. Apple has a list of issues that could arise if you use a cable that is not certified. On that list is "Damage to your device". Enough reason for me to go with the Apple MFi certified cable, but if you need more reasons to read more. Finding these cables isn’t hard I’ve purchased several on Amazon, but if you want to play it safe you can always direct to Apple online and purchase a cable. I would recommend a 6ft or 10ft cable depending on how far the power source is to the kiosk.
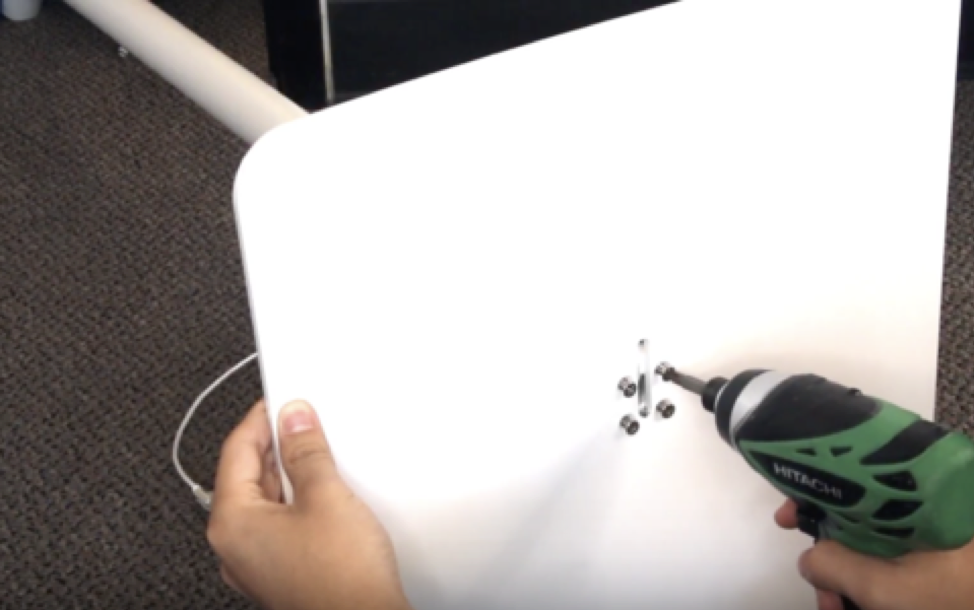 Secure the kiosk base to the arm
Attach the arm to the base
You do want to pay special attention when doing this step. Ensure the cable remains above the base otherwise the cable will be smashed if it is run beneath the base. With the cable above the base secure, the arm to the base using the included four screws. If you would like you can use a USB extension cable if the power cable doesn’t reach the power source.
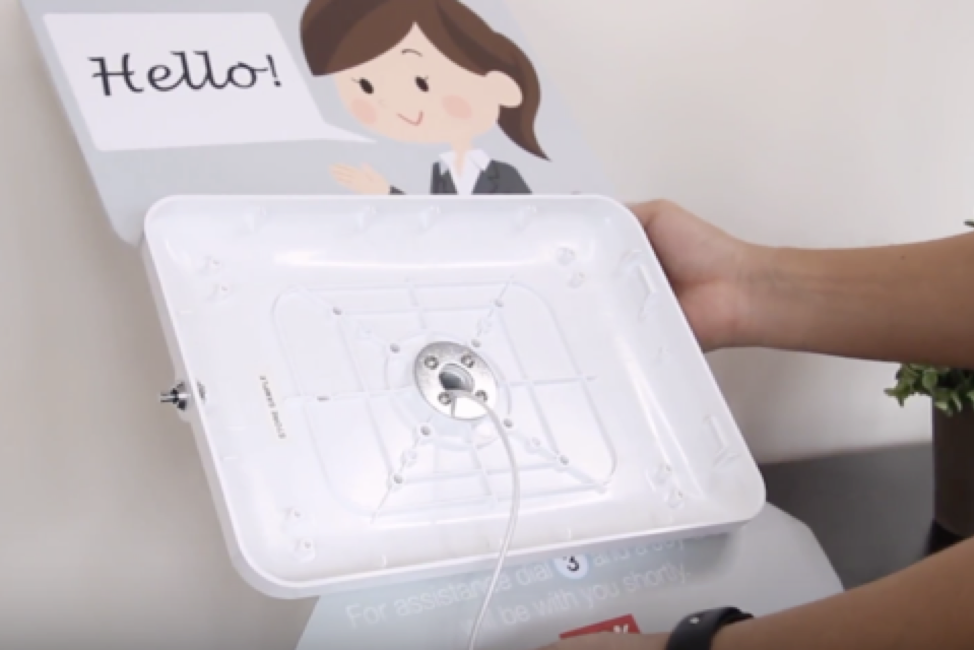 Attach graphic panel & enclosure
Install enclosure & optional graphic panel
With the kiosk turned right side up the enclosure can now be installed to the kiosk arm. A metal circular plate and four screws keep the enclosure secured to the kiosk arm. A graphic panel, sold separately, can be utilized to welcome, navigate, inform and attract guests. I would highly recommend picking up one of these and applying some fun graphics to it to help engage with your guests.
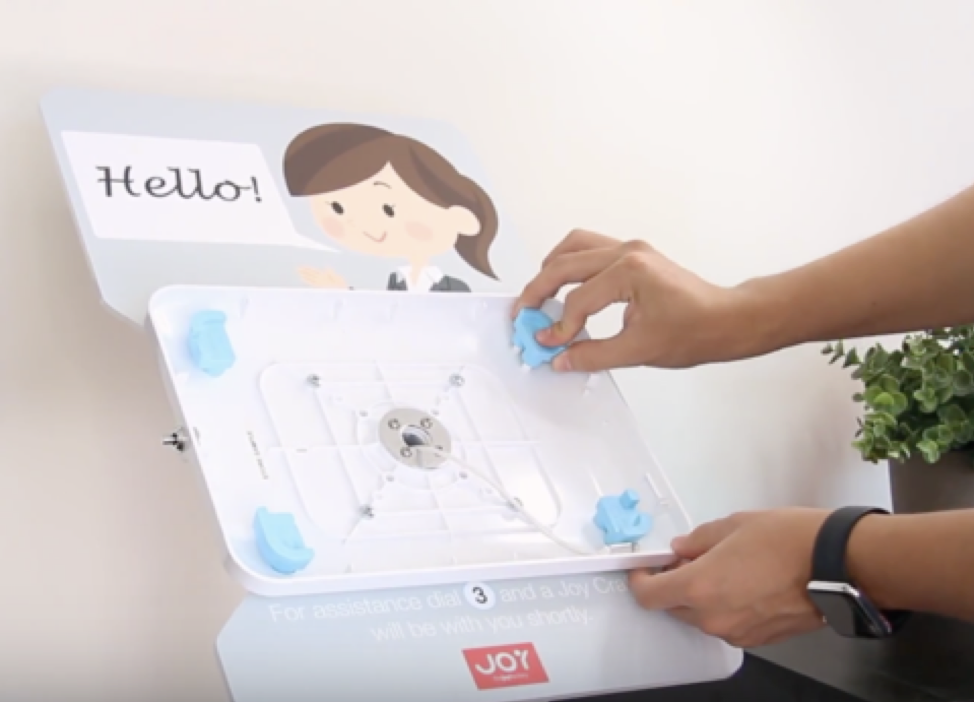 Insert fit kit
Place the fit kit
If your kiosk has a plastic enclosure a fit kit will be needed to keep the tablet in place. The fit kit will consist of four rubber pads that attach in all four corners of the enclosure. For more detailed instructions on how to properly install the fit kit refer to the installation manual that came with the unit.
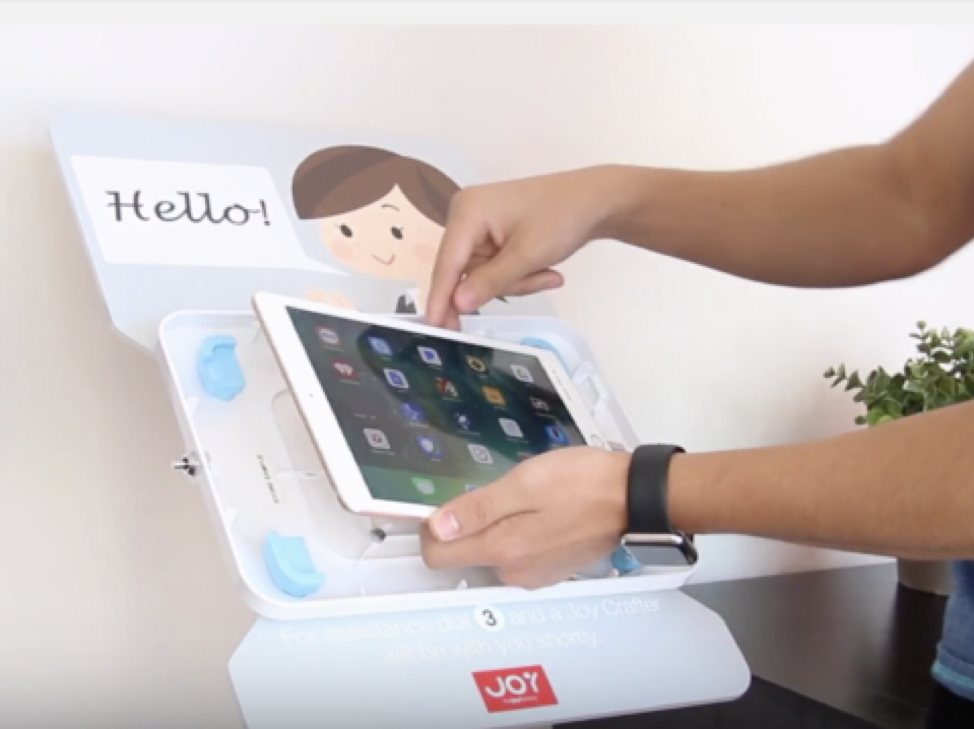 Install the device & lock the kiosk enclosure
Install and secure the device
With everything intact, it is now safe to place the device into the enclosure. I plugged in the charging cable before placing the tablet into the enclosure. Once the device is in place cover it with the provided black face sheet. The face sheet limits your guest's access. If you want your guests to have free run of the entire tablet interface give us a call we have different face sheets to allow for that. After the face sheet is in place the faceplate covers it and secures your iPad in place.
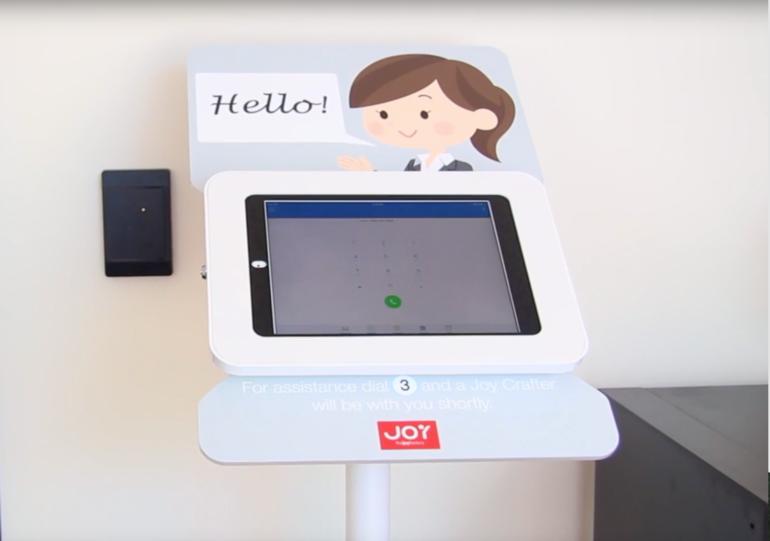
.png?width=974&name=blog-014-pic-07%20(1).png) Setup App and your kiosk is all set
Setup App and your kiosk is all set
Turn on & set up the App of choice
In our office, we use the RingCentral App, which rings, through our phone system. I recommend shopping around to find the best App for your company, but I can recommend a few to help you get started; RingCentral, Onebox, Bria Stretto, and Line2.
Here's another great resource for gaining knowledge about virtual workspaces - The Ultimate Guide to Virtual Offices
What do you think of this setup? Maybe you can share your setup with our readers and us. We’d love to hear from you. Comment below.